Documentation
Identify Equipment
The equipment identification wizard walks you through how to tag equipment.
Step 1
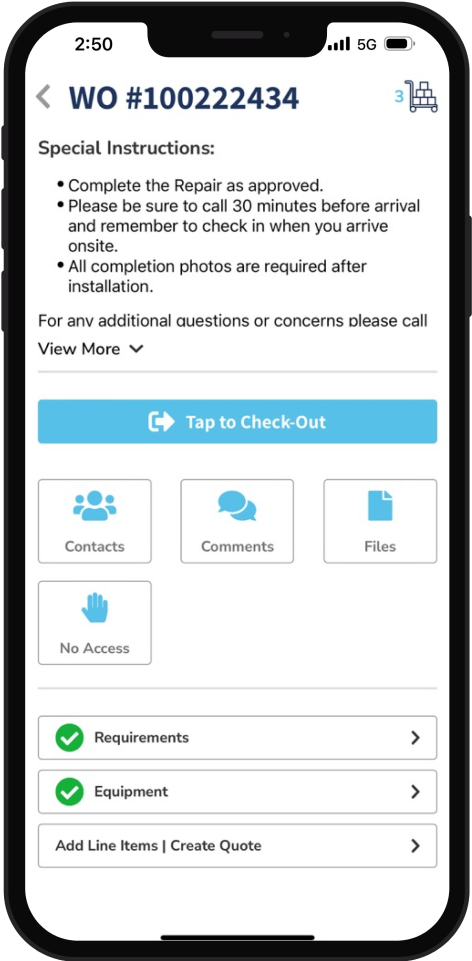
Locate the work order and tap it to display it. If you don't see it, slide the calendar to next week or last week, or tap Jobs to filter your work orders.
Step 2
Tap Start Job, choose Site Visit, and tap Start.
Step 3
Upload a photo of the property with the address, then tap Verify and Start Job. For more detail on checking in and to learn what to do if you cannot access the property, see Starting a Job. You must be checked in to perform equipment identification.
Step 4
Verify that the Check-In icon appears next to the Status at the very top of the work order.
Step 5
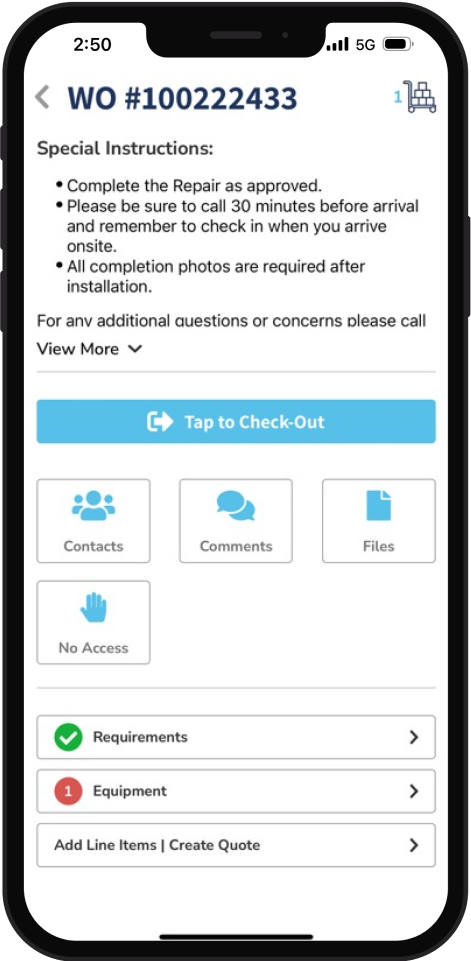
Tap the Equipment section at the bottom of the work order. The red circle indicates how many pieces of equipment must be tagged at this property.
Step 6
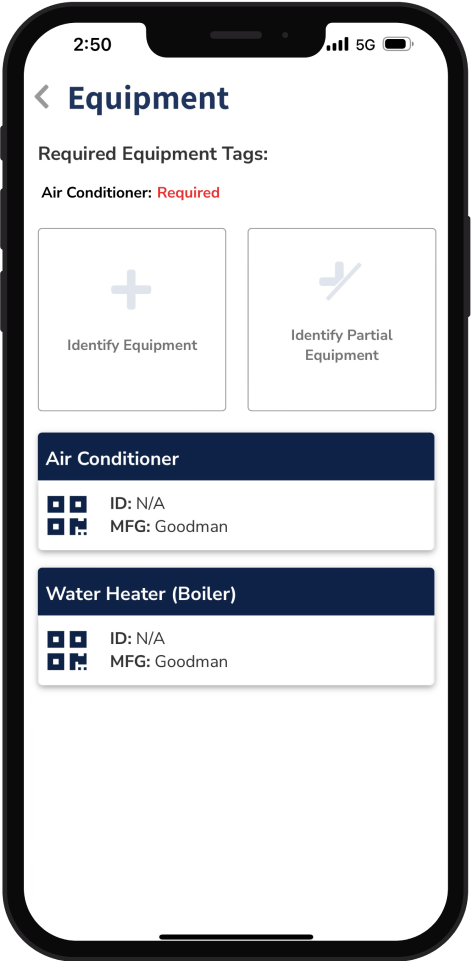
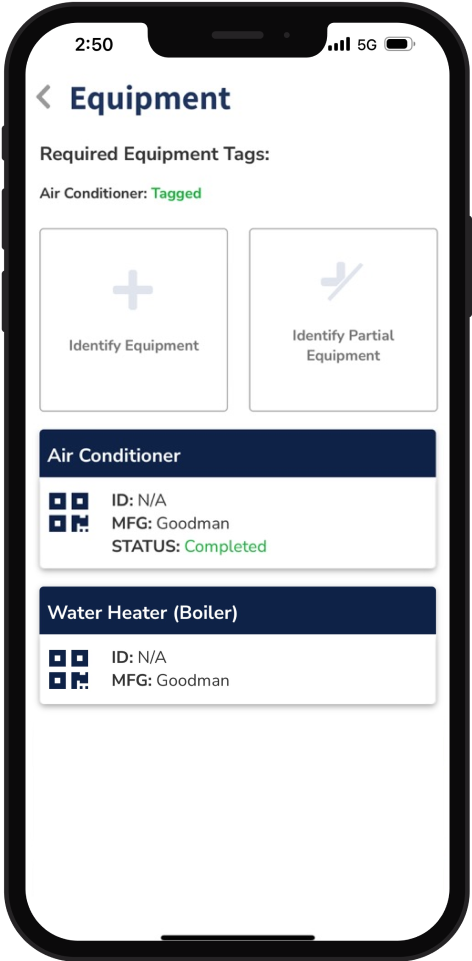
The Required Equipment Tags Screen indicates which equipment you will tag. Each unit already tagged at the property will show on it’s own card here.
To tag/identify a piece of equipment that isn’t listed here, tap Identify Equipment and proceed through the wizard. If something is preventing you from tagging a new piece of equipment, tap Identify Partial Equipment, choose the Equipment type, select the reason, and tap Tag.
If you're deleting or replacing equipment that was previously tagged, tap the equipment, tap Actions, select Retire Equipment, choose a reason, and tap Submit.

Step 7
Hold your phone up to the QR code to automatically take a photo. If prompted, tap OK to let Motili access your camera.

Tip: If the equipment does not have a QR code, tap Skip. After you click Next, a check mark appears on Step 1 of the wizard and you automatically move on to Step 2.
Step 8
For Step 2, tap Open Camera or Open Library to add a photo of the name plate, then tap Next. You can take a photo or choose an existing photo from your camera library. When you take a photo while using the Mobile App, the photo is stored in a new album called Motili. Each photo you add to a work order must be unique.
Step 2 now has a check mark. If you are not satisfied with that photo, tap the photo, tap Delete Photo, and then tap OK.
Step 9
For Step 3, tap the type of equipment, choose the equipment’s attributes, and tap Confirm.
Step 10
For Step 4, if the Manufacturer appears and is correct, tap it and tap Confirm. If you need to edit the Manufacturer, do so before you tap Confirm.
Step 11
For Step 5, if the Model Number appears and is correct, tap it and tap Confirm. If you need to edit the Model Number, do so before you tap Confirm.
Step 12
For Step 6, if the Serial Number appears and is correct, tap Confirm. If you need to edit the Serial Number, do that before you tap Confirm.
Step 13
For Step 7, tap the year the equipment was manufactured and tap Confirm.

Step 14
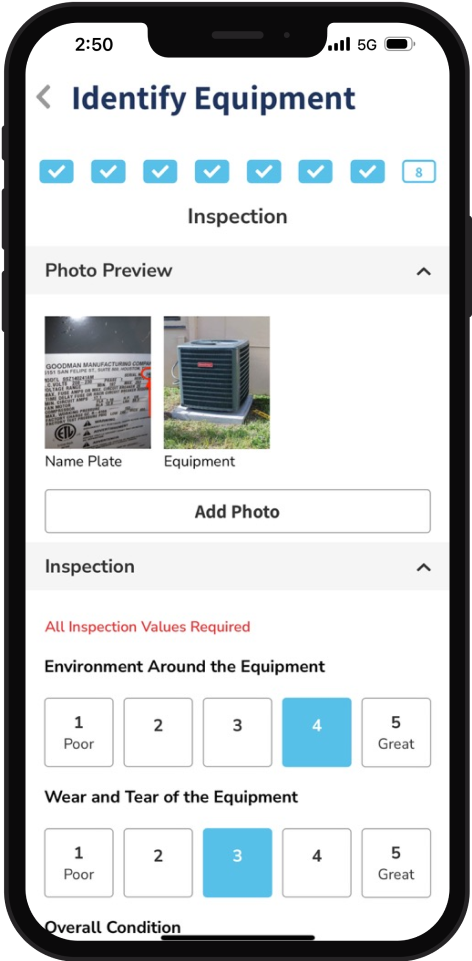
For Step 8, tap Add Photo and upload photos of the equipment. Two photos are required for an equipment tagging job.
a. Tap a number to rate each of the three environmental factors.
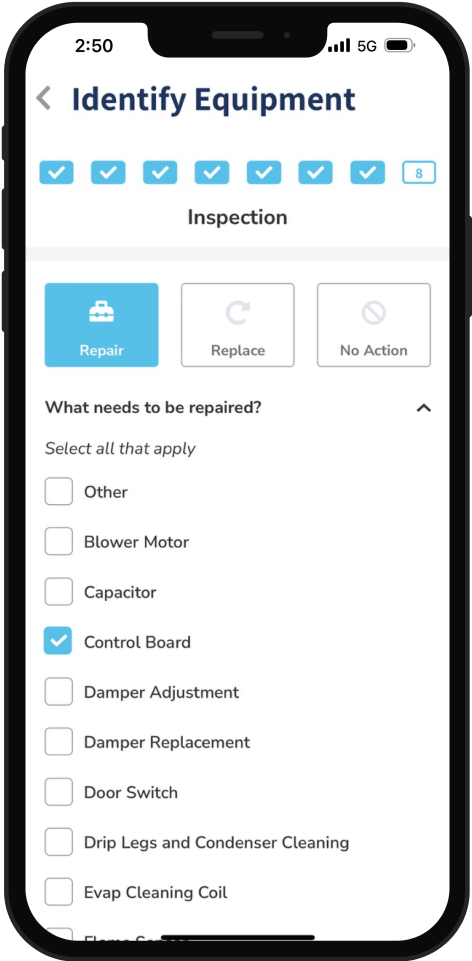
b. Tap a recommendation (Repair, Replace, or No Action) to indicate the next step.
Repair - Tap Repair and select the components that need to be repaired.
Replace - Tap Replace.
No Action - Tap to indicate that a repair or replacement is not required.
c. (Optional) Tap Add Comment, type other details about the piece of equipment, and tap Send to upload the comment to the work order. If a Motili Admin updates a comment in a work order or quote, you can see those changes here.
d. (Optional) Tap Review for a summary of your responses.
Step 15
Tap Tag Equipment. The Equipment page shows that you've completed tagging one piece of equipment.
Step 16
When you finish tagging all the equipment necessary, tap Back. Verify that the Equipment section now has a green check mark.
If a checklist or additional photos are required, see Add Photos and Files.